My 2¹² cents: Yup, 4K Really is for Programmers

You’ve no doubt heard the hype surrounding the use of 4K (Ultra HD) in software development. I’ve been using the 4K 39" Seiki SE39UY04 television as a computer monitor for a couple of weeks now and wanted to share my story. In case you’re trying to decide whether or not to pull the trigger, this article is for you.
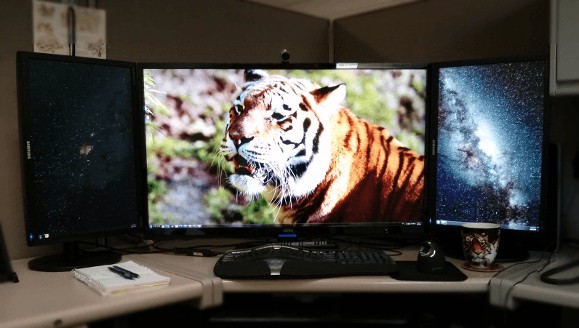
In case you haven’t heard about 4K yet, it’s basically HD (1080p)… times four! It has a resolution of 3840 x 2160 versus HD’s measly 1920 x 1080. 8,294,400 pixels versus 2,073,600 pixels. If you use it as a desktop monitor that means you have four times the space available to crank out seriously productive work, or to just sit and look at lifelike pictures of tigers and space, like in the screenshots below. :)
Here’s the really crazy part: As of the time of this writing you can get it on Amazon and other sites for around $339. You won’t find 4K anywhere else for less than 1-2 grand!
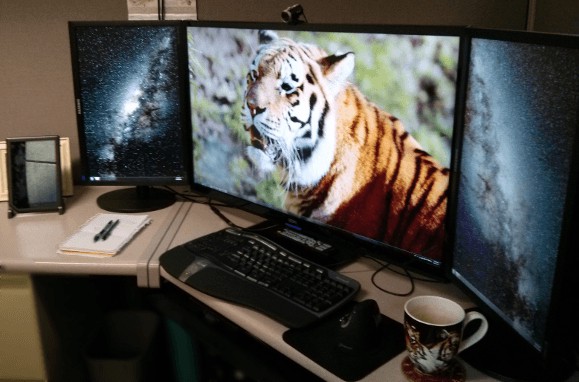
Grrrr! And now for a nice angle shot:
General Impressions
Pretty amazing, opulent, decadent even. Whether it’s my imagination or not, having all of that space on which to arrange my work makes me feel a smidgen more productive. It’s a sweet feeling when you’re typing in a command and you say, “Okay, what was that parameter again? Let me Alt+tab over to my brow.. Oh wait! I don’t have to! It’s already open!”
Text is a little smaller that I was used to but I found that it was so crisp that my eyestrain was actually reduced. From what I read I was a little worried about the 30Hz refresh rate but it hasn’t been a problem at all. I only notice it when scrolling through a lot of code; it seems a little blurry. I was worried about the glossy screen too but it hasn’t bothered me. (I can even wave to the guy with the awesome monitor setup!) Some also complained about mouse lag but I haven’t noticed anything. That being said I use the keyboard much more than the mouse and I’m not a gamer.
If I had the money and could choose between the 39" and 50" models, I would still choose the 39". I think the increased size of the pixels on the 50" model would reduce the sharpness of text and images.
Of course you need a fairly powerful video card to drive 8 million moving pixels (or the nearly 12 million I’m sporting in the screenshot), more so if you plan on gaming or watching videos. I’m doing neither of those things, as I’m not a gamer or a movie critic. As has been stated succinctly elsewhere, 4K is for programmers. My computer doesn’t even have a dedicated graphics card and it does just fine.
Pros
- 8 million pixels of desktop space
- Rock bottom price
Cons
- Glossy screen (Hey look! Who’s that productive guy sitting there looking at me?)
- 30Hz refresh rate
- Color reproduction is inaccurate. (Only a big deal if you’re doing graphics work)
- DPMS unaware. (Computer thinks it’s disconnected when it goes to sleep. UPDATE 2018: Windows 10 handles this much better than Windows 7)
- It’s hard to use it if you work on the beach
Where to Buy
Amazon has it for $339 as of the time of this writing. It’s also available at Wal-Mart and Newegg and TigerDirect at similar prices.
If you don’t have HDMI on your computer, you’ll have to do your homework. Neither VGA nor DVI can handle that kind of throughput. DisplayPort will though. I was able to get it working via DisplayPort with this active adapter (or this one if you have Mini DisplayPort).
Setup
Television Setup
The first thing you’ll want to do is update the firmware:
- Format a flashdrive as FAT32
- Download
the firmware for the 50" version (Yes, the fifty inch version) from Seiki’s support website. The file I downloaded looks like SE50UY04_20130528.
- (UPDATE: Seiki seems to have removed the firmware from their site. Alternate link )
- Unzip the file and copy the “install.img” file to the flashdrive.
- If you haven’t already done so, run the TV’s setup wizard and then turn it back off.
- Plug the flash drive in and turn on the TV.
- Press “MENU” on the remote.
- Press “0” (zero) four times in a row to access the hidden service menu.
- Choose “Software Upgrade”, then “Yes”, and wait for the process to finish. It takes a couple of minutes, so be patient.
- You’ll have to go through the setup wizard again
Then you’ll need to coax it into behaving less like a TV and more like a monitor. You can find the following settings via the regular menu or via the secret service menu you used to update the firmware (Pressing 0000 at the menu)
- 4 Hours Auto Standby: Off
- Backlight: 75
- Blue Gain: 126
- Blue Offset: 510
- Brightness: 43
- Color Temp: normal
- Color: 34
- Contrast: 42
- DCC: Off
- Green Gain: 132
- Green Offset: 504
- Red Gain: 141
- Red Offset: 532
- Sharpness: 0
Of those settings, the “Sharpness” setting is the most important, or stuff will look really, really lousy.
After that plug the TV into your computer with the provided HDMI cable. If all goes well, a glorious Ultra HD picture will come bursting out. Then, just make sure that your graphics card is indeed putting out 3840x2160 at 30Hz. At first my computer wanted to run it at 29Hz. When it’s that low already, you don’t want to be cheated even 1Hz. That hurts, man.
Windows Setup
Some reviewers tell you to bump up your DPI. I didn’t. I can see the text just fine and want every inch of luxurious real estate I can get my mouse on. In some instances, text is almost too small, but not quite. I usually zoom in a little in a browser or word processing window.
One thing you’ll notice is that your window manager will need a little help. There’s just so much space it’s nice to have a tool to quickly move around and organize windows. DisplayFusion has helped in that area. It even allows you to have a taskbar on each monitor. (UPDATE: I found DisplayFusion to be a bit heavy-handed, so I switched to Divvy )
Extras
As I mentioned earlier, when the TV goes to sleep, the computer thinks it’s disconnected and you lose all of the placement and sizing of your windows. That’s where AutoHotKey comes to the rescue
if you’re using Windows. Add a hotkey that runs winsave.ahk when you press Winkey+L to lock the screen. Add another hotkey of your choice that runs winrestore.ahk. When you come back to your machine and all of the windows are askew, press that key combination and it should restore your windows to their rightful place and position.
In Conclusion
It’s amazing. If you’re a programmer, get it! You won’t regret it. If you aren’t a programmer or do graphics/print work, or just don’t want to have to fiddle with stuff, don’t get it.
Ty Walls
Digital Construction Worker
Ty Walls is a software engineer in love with creating, learning, and teaching.